


Generative art (generative or procedural art) can scare you off if you have never encountered it before. In short, this is a concept of art that literally creates itself and does not require hardcore programming knowledge for the first time. So I decided to dilute our tape a little, they drove.
What is generative art?
This is the result of a system that makes its own decisions about an object instead of a person. A system can be as simple as a single Python program if it has rules and a moment of chance.
With programming, it’s pretty easy to come up with rules and restrictions. There are conditional statements for this. But finding ways to make these rules create something interesting may not be so simple.
Conway’s Game of Life
The Conway’s Game of Life is a well-known set of four simple rules that define the “birth” and “death” of each cell in the system. Each rule plays a role in promoting the system through each generation.
Although the rules are simple and easy to understand, complex patterns quickly emerge that ultimately produce exciting results.
The rules may be responsible for laying the foundation for something interesting, but even something as exciting as Conway’s Game of Life is predictable. The four rules are the determining factors for each generation.
Therefore, to get unexpected results, you need to introduce randomization in the initial state of the cells. Starting with a random matrix, each execution will be unique without the need to change the rules.
The best examples of generative art (procedural art) are those that find a combination of predictability and randomness to create something interesting that is statistically impossible to repeat.
Why should you try this?
Generative art will not always be what you want to spend time on. But if you decide to work on it, then you can count on the following advantages:
- An experience. Generative art (procedural art) is another opportunity to hone new and old skills. It can serve as an input for working out concepts such as algorithms, data structures, and even new languages.
- Tangible results. In programming, we rarely see the physical results of our efforts. Well, or at least I don’t see it. Right now in my living room, there are several posters with prints of my procedural art. And I like that this is done by code.
- Attractive designs. Everyone had the experience of explaining a personal project to someone, possibly even during an interview. Generative art speaks for itself. Most people will appreciate the results, even if they cannot fully understand the methods.
Where to begin?
Getting started with generative art (procedural art) is the same process as getting started with any other project. The most important step is to come up with an idea or find it for further development. Once you have a goal, you can begin to work on its achievement.
Most of my creative projects are in Python. It is a fairly simple language with many useful packages that help with image processing.
Fortunately, you don’t have to look long for where to start – below I will share my code.
Sprite generator
This project started when I saw a post with a sprite generator written in JavaScript. The program created 5 × 5 pixel art sprites with random color options, and its result resembled multi-colored space invaders.
I wanted to practice image processing in Python, so I decided to recreate this concept myself. In addition, I thought that I could expand it, since the original project was very limited in the size of sprites. And I want to indicate not only the size of the sprites, but also their number and even the size of the image.
Here are two different results of my program:

7×7-30–1900
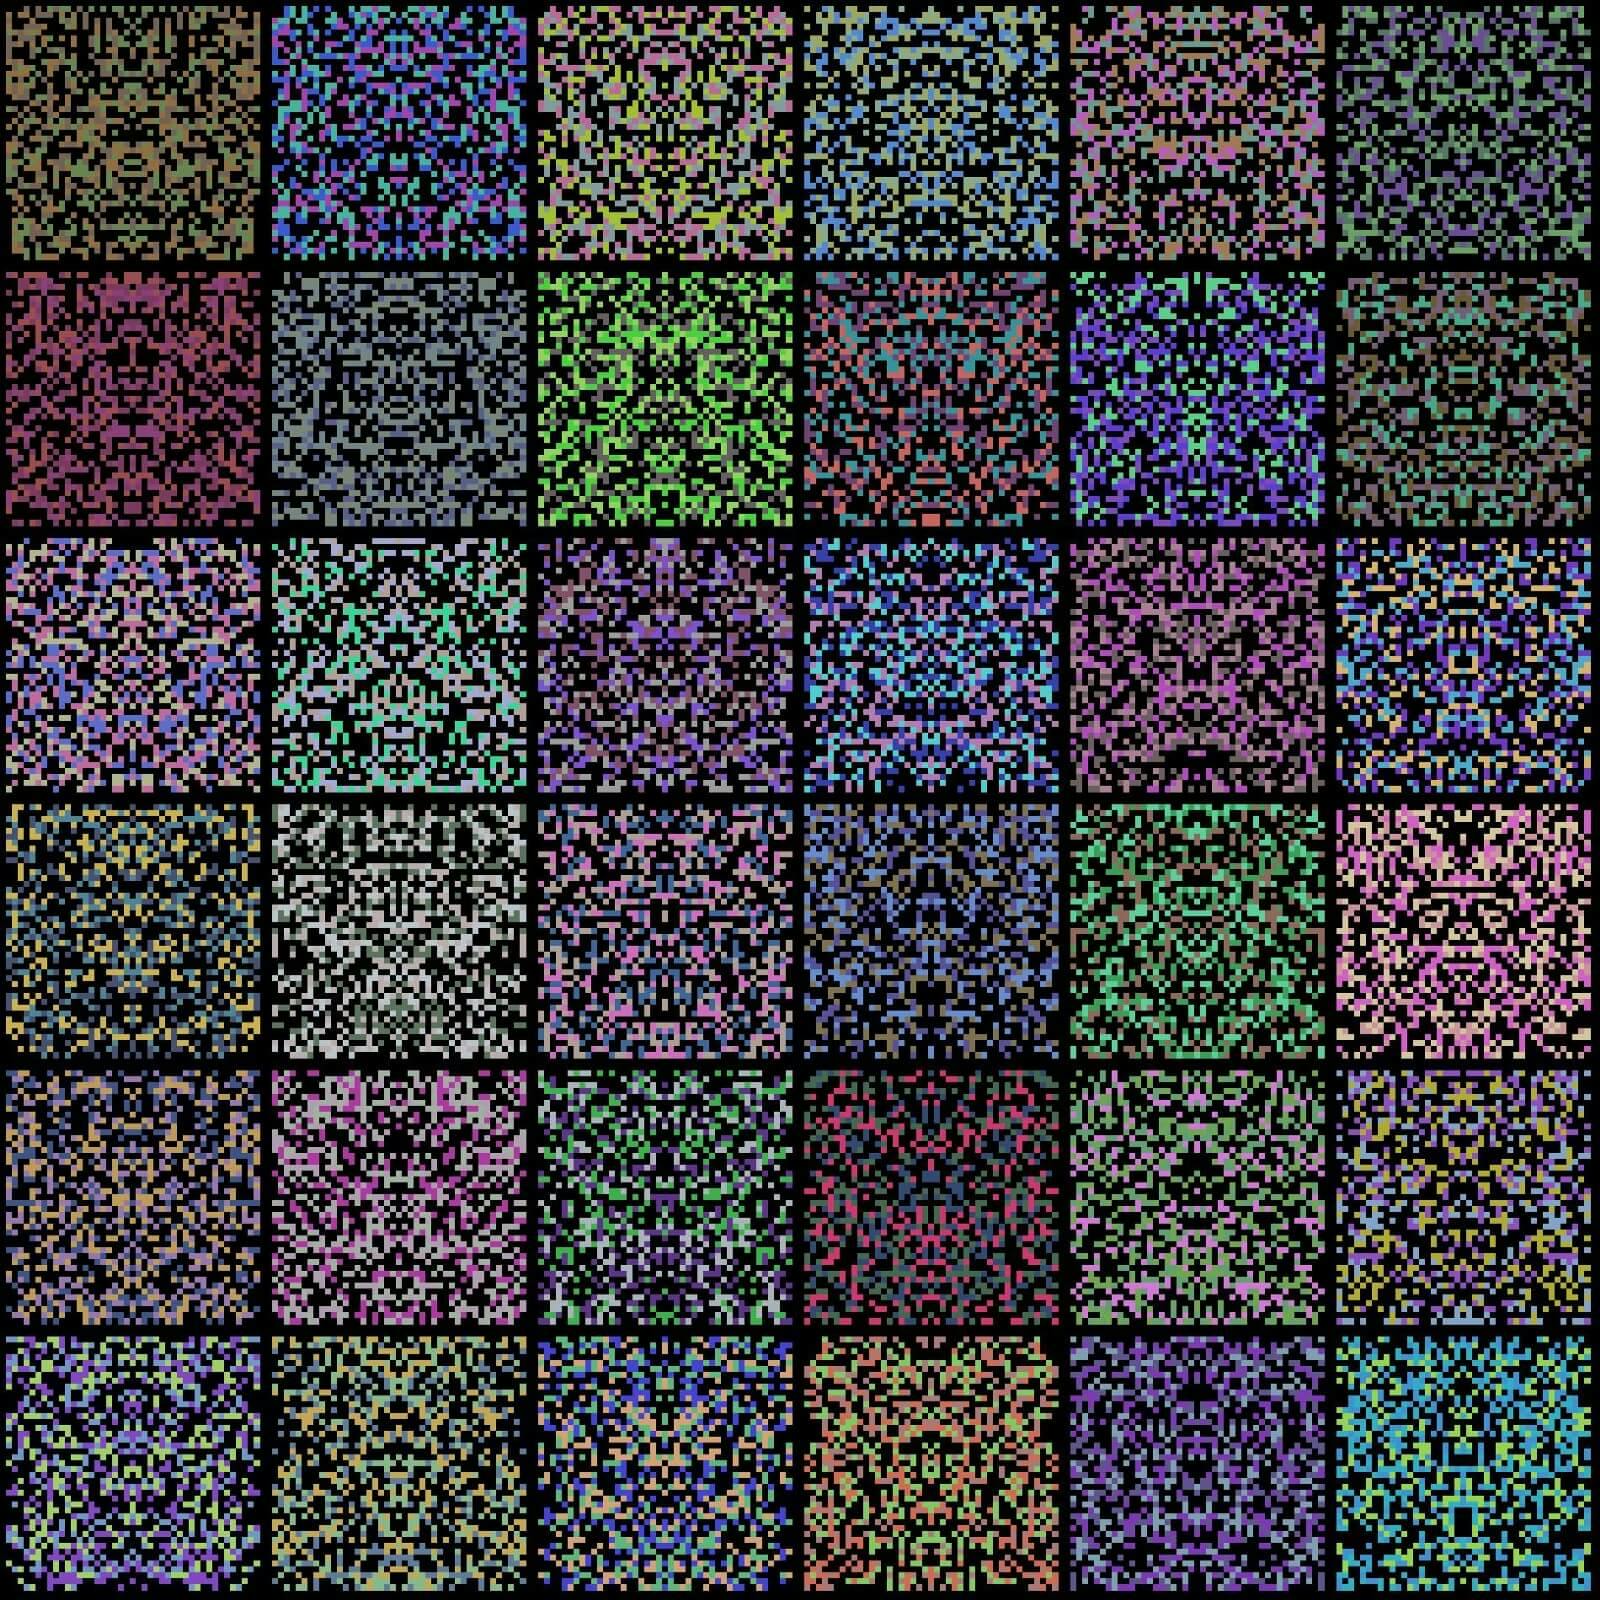
43×43-6–1900
These two images are completely different from each other, but they are both the results of the same system. Not to mention the fact that due to the complexity and random generation of sprites, there is a high probability that even with the same arguments, these images will forever remain one of a kind. I love it.
Environment
Before you get acquainted with the sprite generator, you should prepare a small foundation for the job.
If you haven’t worked with Python before, download Python 2.7.10 . At first, I had problems with setting up the environment, if you also encounter them, look in virtual environments.
After setting up the environment, you can copy my code to a file with the extension .py and run the following command:
python spritething.py [SPRITE_DIMENSIONS] [NUMBER] [IMAGE_SIZE]
For example, the command to create the first matrix of sprites would be:
python spritething.py 7 30 1900
Code
import PIL, random, sys from PIL import Image, ImageDraw origDimension = 1500 r = lambda: random.randint(50,215) rc = lambda: (r(), r(), r()) listSym = [] def create_square(border, draw, randColor, element, size): if (element == int(size/2)): draw.rectangle(border, randColor) elif (len(listSym) == element+1): draw.rectangle(border,listSym.pop()) else: listSym.append(randColor) draw.rectangle(border, randColor) def create_invader(border, draw, size): x0, y0, x1, y1 = border squareSize = (x1-x0)/size randColors = [rc(), rc(), rc(), (0,0,0), (0,0,0), (0,0,0)] i = 1 for y in range(0, size): I *= -1 element = 0 for x in range(0, size): topLeftX = x*squareSize + x0 topLeftY = y*squareSize + y0 botRightX = topLeftX + squareSize botRightY = topLeftY + squareSize create_square((topLeftX, topLeftY, botRightX, botRightY), draw, random.choice(randColors), element, size) if (element == int(size/2) or element == 0): I *= -1; element += I def main(size, invaders, imgSize): origDimension = imgSize origImage = Image.new(‘RGB’, (origDimension, origDimension)) draw = ImageDraw.Draw(origImage) invaderSize = origDimension/invaders padding = invaderSize/size for x in range(0, invaders): for y in range(0, invaders): topLeftX = x*invaderSize + padding/2 topLeftY = y*invaderSize + padding/2 botRightX = topLeftX + invaderSize - padding botRightY = topLeftY + invaderSize - padding create_invader((topLeftX, topLeftY, botRightX, botRightY), draw, size) origImage.save(«Examples/Example-«+str(size)+»x»+str(size)+»-«+str(invaders)+»-«+str(imgSize)+».jpg») if __name__ == «__main__»: main(int(sys.argv[1]), int(sys.argv[2]), int(sys.argv[3]))
This solution is still far from perfect, but it shows that the creation of generative art does not require a ton of code. I will explain the key points.
The main function begins with creating the original image and determining the size of the sprites. Two for loops are responsible for determining the border of each sprite, basically dividing the image size by the number of requested sprites. These values are used to determine the coordinates for each of them.
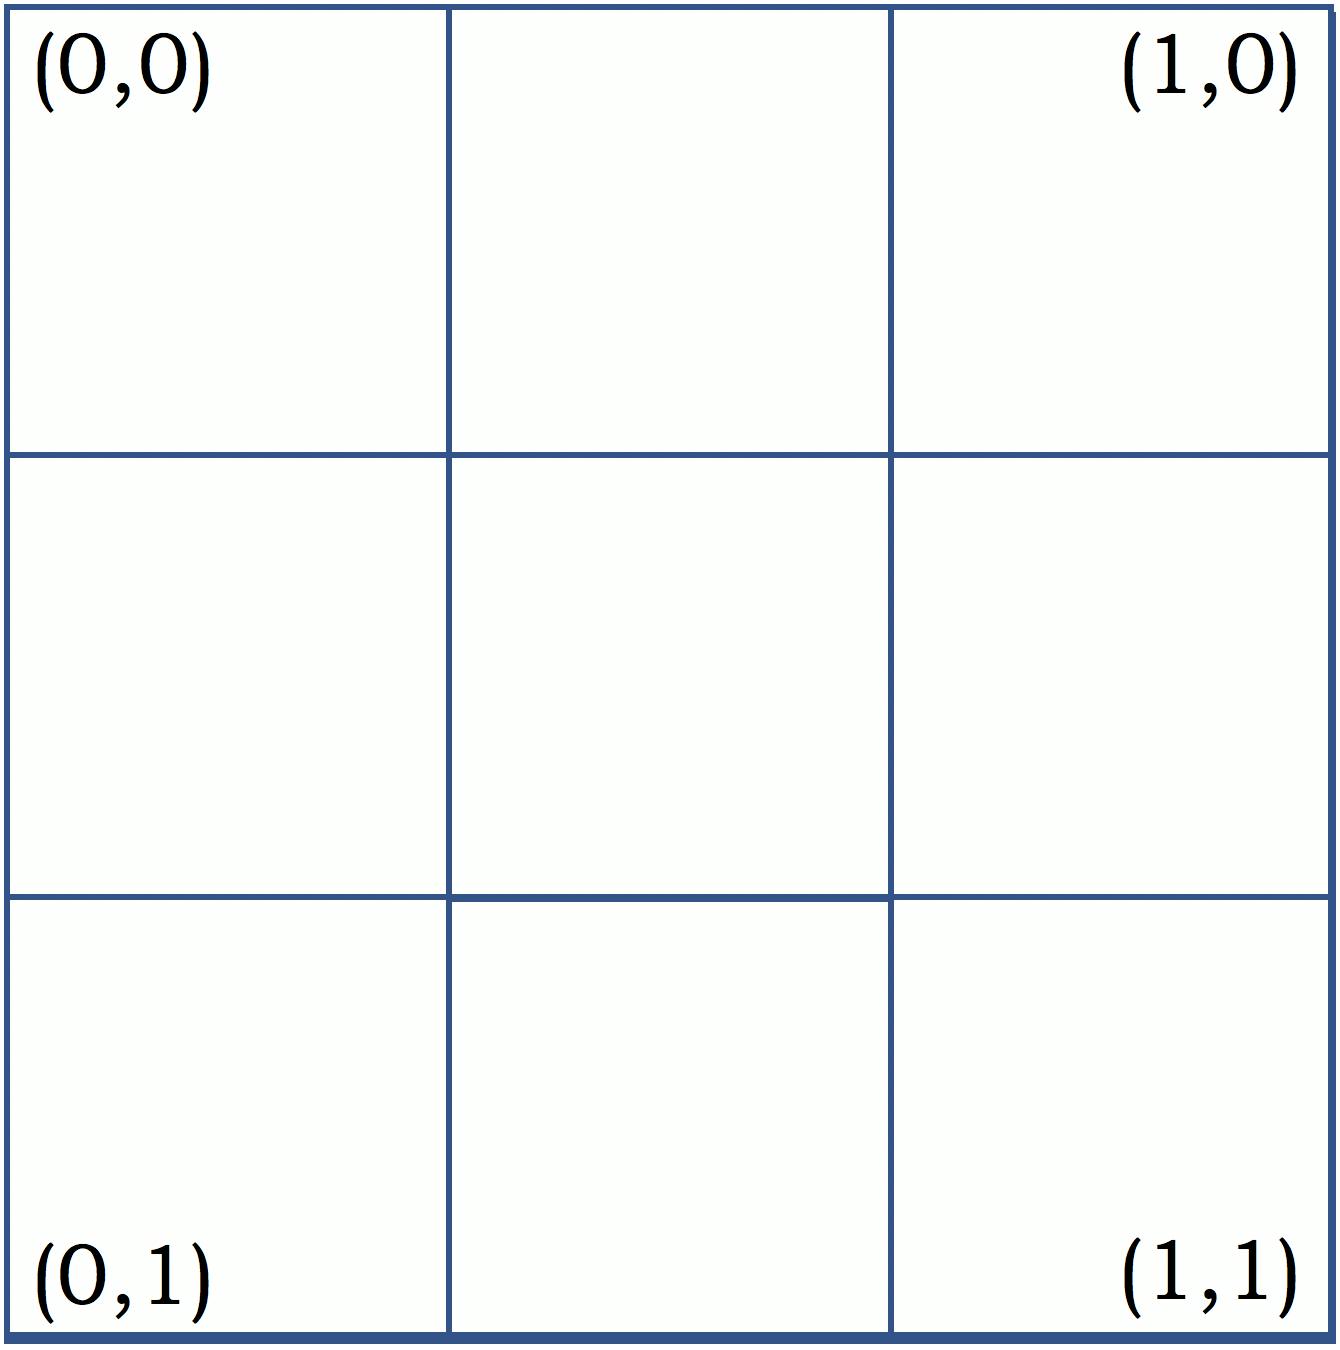
Take a look at the image below. Imagine that each of the four squares is a sprite with size 1. The border that is passed to the next function refers to the coordinates of the upper left and lower right corners.
So the tuple in the upper left sprite will be (0,0,1,1), and the tuple in the upper right will be (1,0,2,1). They will be used as dimensions and base coordinates for the squares of each sprite.
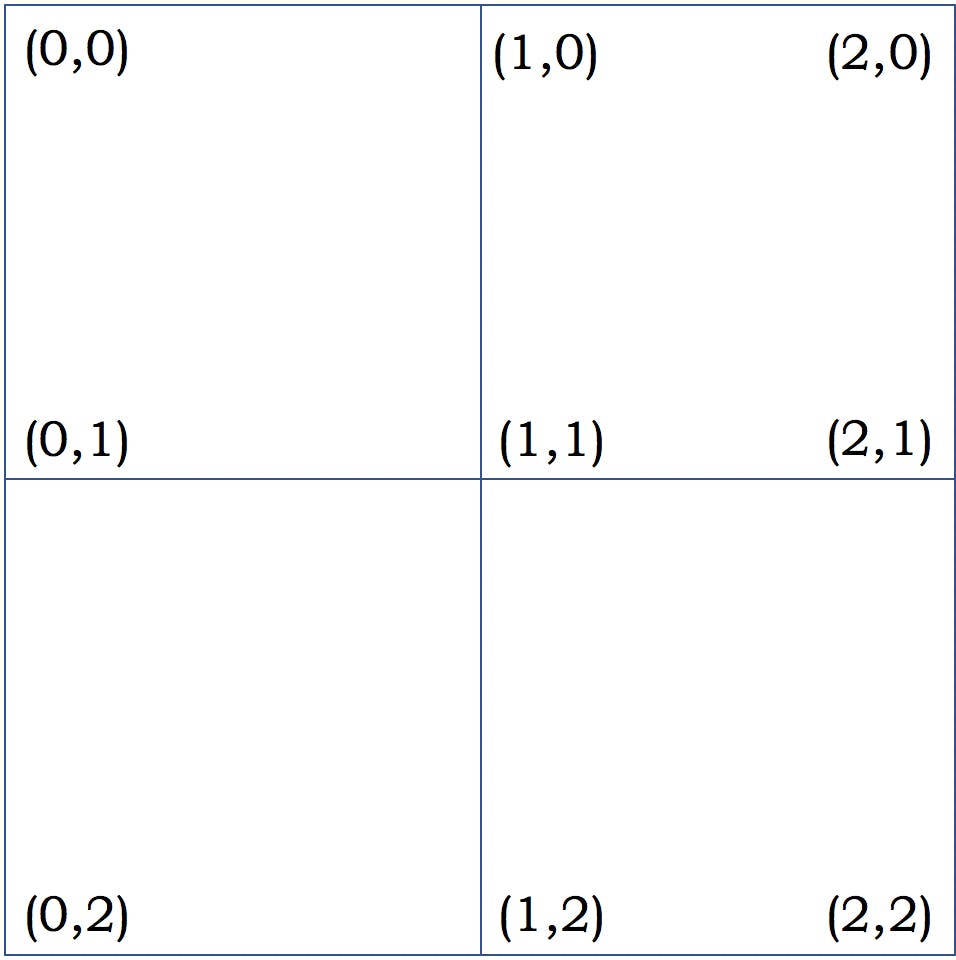
_Example of defining sprite borders create_invader_
functiondefines the border for each square inside the sprite. The same process of determining the boundary is applied here and is presented below, only instead of the full image we use a predefined border for working inside. These final coordinates for each square will be used in the next function to draw a sprite.
An example of a 3 × 3 sprite breakdown.
A simple array of three random RGB tuples and three black ones is used to determine the color to simulate a 50% chance of being drawn. Lambda functions at the top of the code are responsible for generating RGB values.
The real trick of this function is creating symmetry. Each square is associated with an element value. The figure below shows how the values of the elements increase as they reach the center, and then decrease. Squares with matching element values are displayed in the same color.
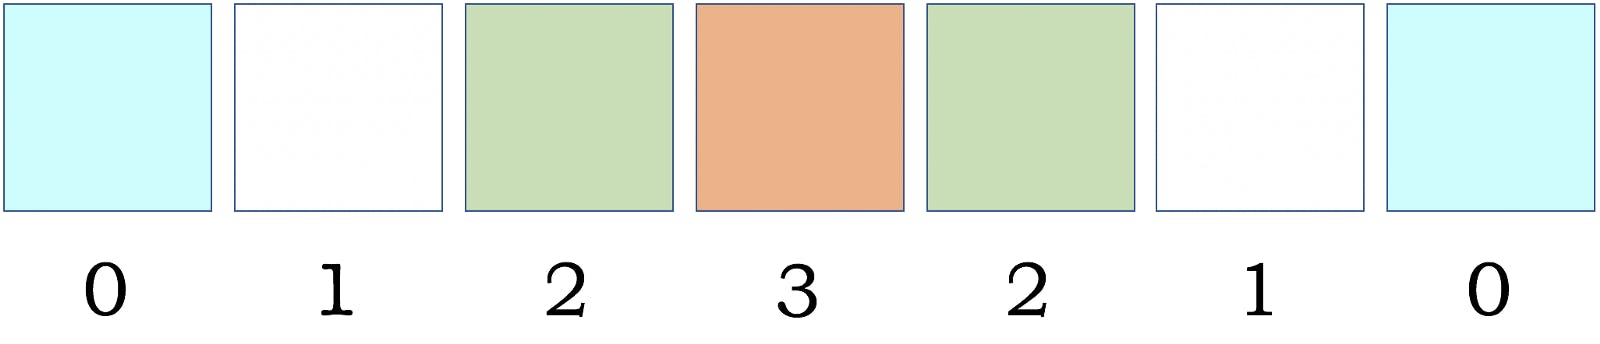
Element values and symmetric colors for a string in a 7 × 7 sprite
Since _create_square_ receives its parameters from _create_invader_ , it uses the queue and previous element values to ensure symmetry. When values first appear, their colors are placed in the queue, and mirror squares remove the colors.
Complete creation process
I understand how difficult it is to read someone else’s solution to the problem and the crooked code, but I hope you find this application. It will be cool if you completely give up my code and find a completely different solution.
Conclusion
Generative art takes time to reach its full potential. In general, there may be more useful projects around than generative art, which is not always worth the time. But it’s a lot of fun and you never know where it can come in handy.
The post How to create procedural art in less than 100 lines of code appeared first on Creador.