


React.js is one of the best and most popular ways to create a one-page application. This is a flexible and convenient framework with which you can either add a component to an existing site or create a new site from scratch.
Now React.js is used in many other frameworks and tools like Next.js, GatsbyJs, Razzle, After.js, etc. Therefore, if you understand React.js well, then it will become easier to use all these frameworks.
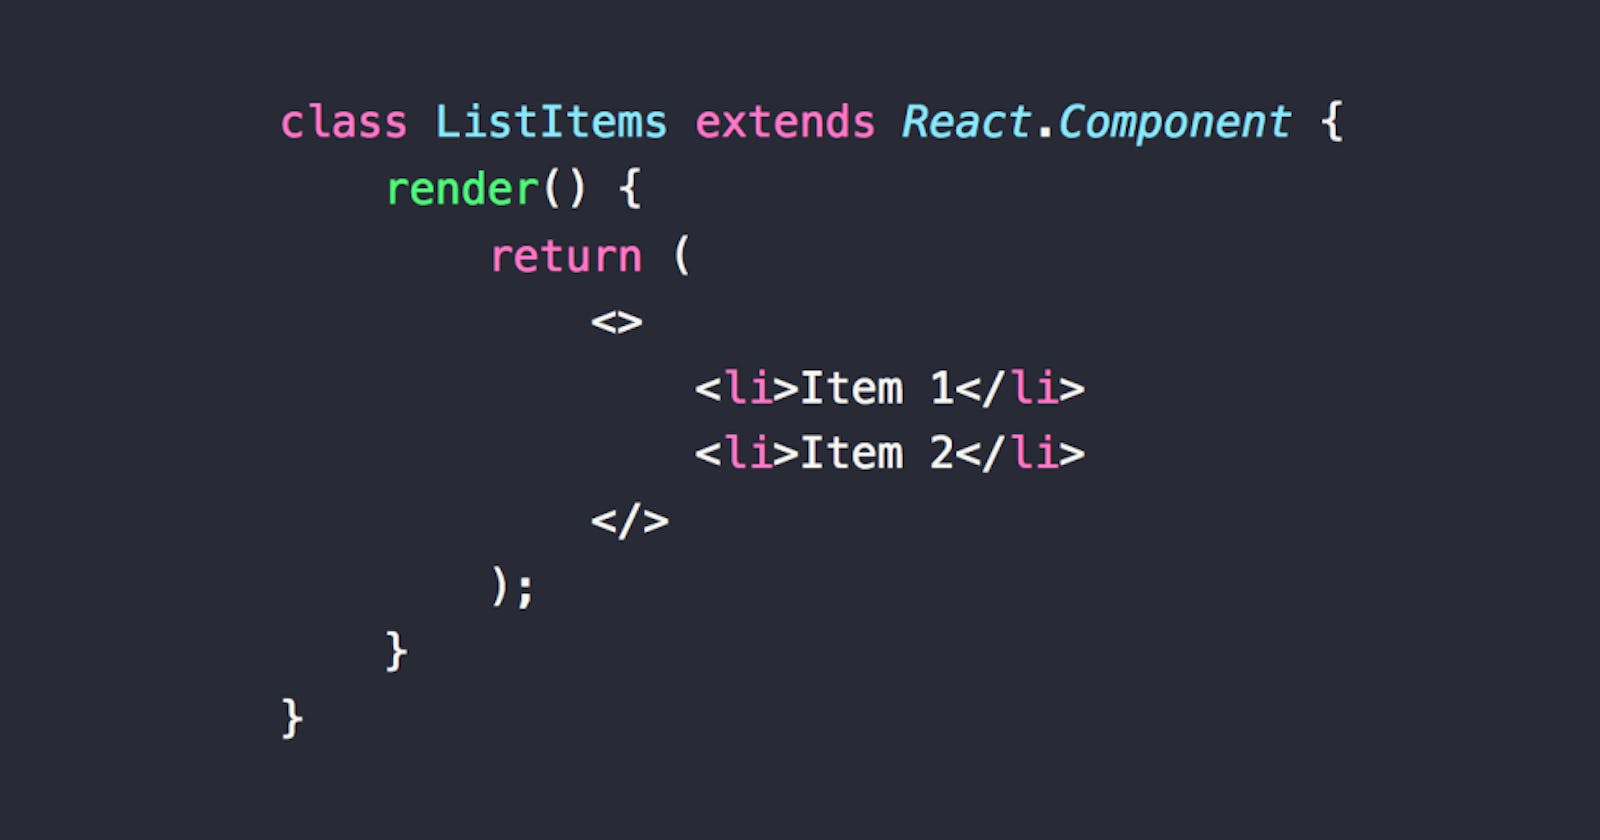
Use fragments instead of div
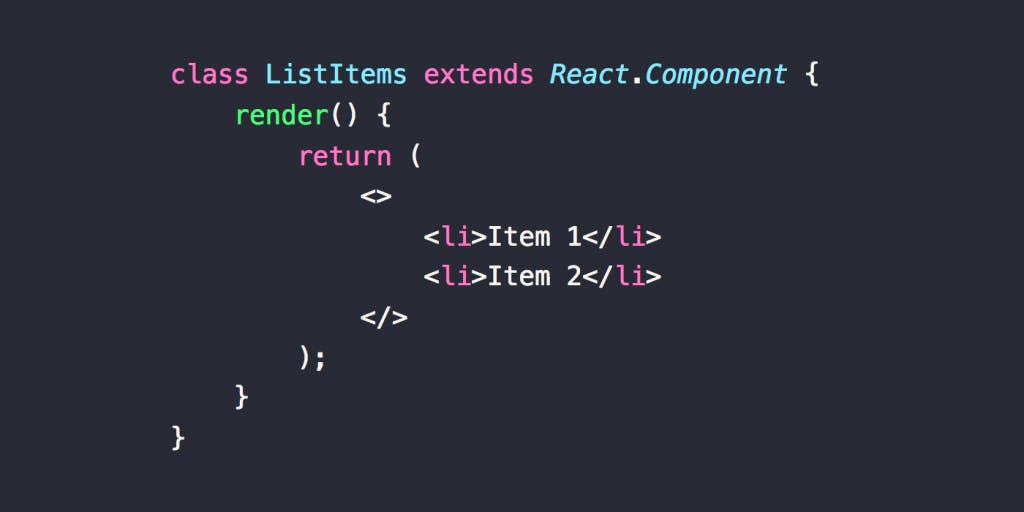
React Fragments
Often we have on hand a lot of components that have to be wrapped in div, because render()allows only one component to be returned. So we add an extra HTML element to the document.
According to the official guide:
Sometimes we break the HTML semantics when we add elements
<div>to JSX to make React code work, especially when working with lists (<ol>,<ul>and<dl>) and tables<table>. In such cases, it is better to use React fragments to group several elements.
import React, { Fragment } from 'react';
function ListItem({ item }) { return (
function Glossary(props) { return (
-
{props.items.map(item => (
))}
More information can be found in the fragments documentation .
Use context more often.
Thanks to the context, you can transfer data through the component tree, instead of manually passing properties at each level. Therefore, if you have several components that need data, use the context. If you have only one child component, use composition.
An example of installing a theme from the documentation:
theme-context.js
export const themes = { light: { foreground: '#000000', background: '#eeeeee', }, dark: { foreground: '#ffffff', background: '#222222', }, }; export const ThemeContext = React.createContext( themes.dark // default value );
themed-button.js
import {ThemeContext} from './theme-context'; class ThemedButton extends React.Component { render() { let props = this.props; let theme = this.context; return ( ); } } ThemedButton.contextType = ThemeContext; export default ThemedButton;
app.js
import {ThemeContext, themes} from './theme-context'; import ThemedButton from './themed-button'; // Intermediate component that uses ThemedButton function Toolbar(props) { return ( Change Theme ); } class App extends React.Component { constructor(props) { super(props); this.state = { theme: themes.light, }; this.toggleTheme = () => { this.setState(state => ({ theme: state.theme === themes.dark ? themes.light : themes.dark, })); }; } render() { // ThemedButton button inside ThemeProvider // uses the theme from the state, while external // uses the default dark theme return ( ); } } ReactDOM.render(, document.root);
Use at least one error margin.
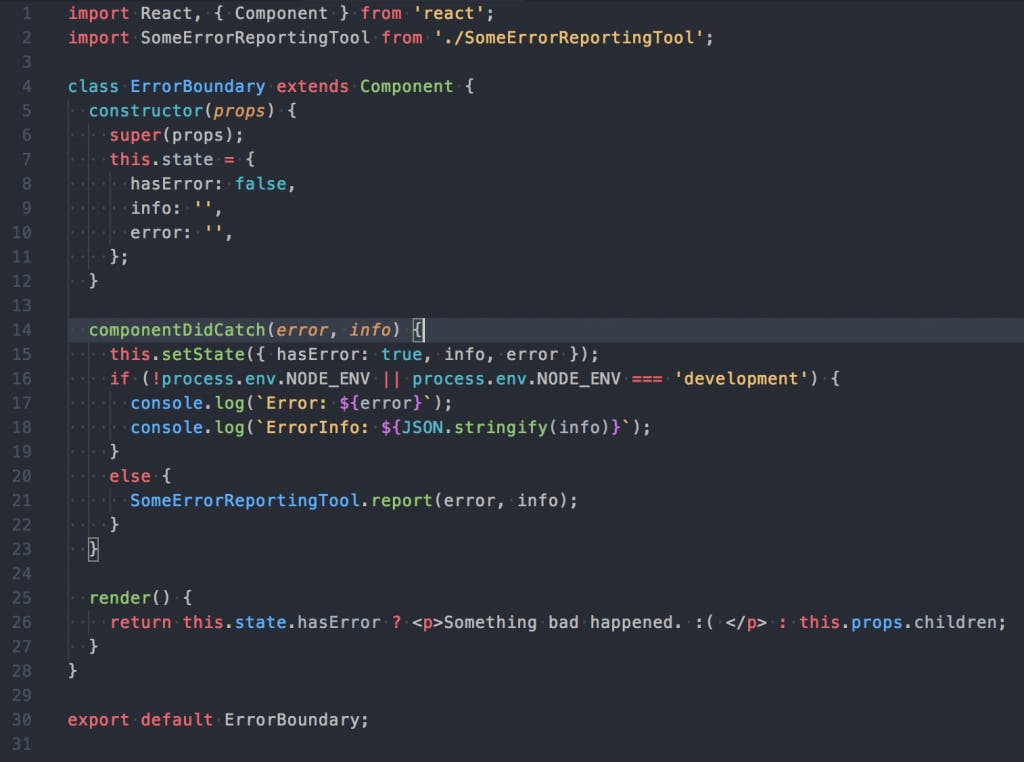
React Component Catch
In React 16, there was such a wonderful thing as error boundaries. By name, it is clear that these are components that catch errors in all child components. The idea is very simple: create a component and use it as a parent every time you need to handle errors. If an error occurs in one of the child components, the error boundaries will be called up for processing. Keep in mind that error boundaries catch display errors. Imperative errors like those occurring in event handlers should be caught by the try/ catch-block of JavaScript.
To log error information, use componentDidCatch():
class ErrorBoundary extends React.Component { constructor(props) { super(props); this.state = { hasError: false }; } static getDerivedStateFromError(error) { // Update the state to the next display. // showed the interface in case of errors return { hasError: true }; } componentDidCatch(error, info) { // You can also catch a mistake logErrorToMyService(error, info); } render() { if (this.state.hasError) { // You can display any message in case of errors. return
Something went wrong.
; } return this.props.children; }}
Now it can be used as a normal component:
If ErrorBoundaryan error occurs in the component itself, will it not be able to process it?
This feature was available in React 15 under the name unstable_handleError(). This method no longer works, and with a beta release of version 16 you need to use it componentDidCatch() instead.
React developers have provided a tool to automatically change the code.
Use production assembly in a real environment
The official website lists configurations that can improve performance. Do not forget to familiarize yourself with them before deploying the product.
Here you can read the manual.
The configuration will take only 10 minutes, and in return your application will get a big performance boost.
Use ref links to interact with the child.
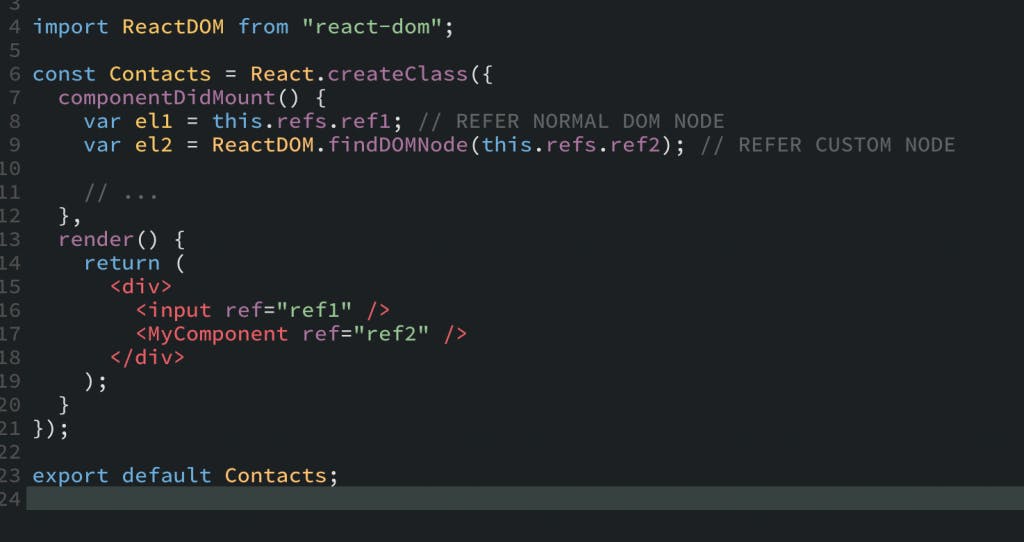
React Ref Child
We can use ref’y to activate animation, select text or control the focus. For example, to set focus in React, we can refer to DOM elements. With the help of refs, we first create a reference to an element in the JSX component class:
class CustomTextInput extends React.Component { constructor(props) { super(props); // Create a link to store the textInput DOM DOM element. this.textInput = React.createRef(); } render() { // Use callback ref to save the link to the item. // in the instance field (for example, this.textInput). return ( ); } }
If necessary, we can set the focus anywhere in the component:
focus() { // Explicitly set focus using the DOM API // Note: "current" is needed to gain access to the DOM node this.textInput.current.focus(); }
See the React documentation for details.
Use code sharing
If you use CRA ( create react app ) or Next.js, then you should already have a ready web pack configuration file. It will create one file (bundle) that will contain your entire application. If you use third-party libraries and/or the application grows in size, then the bundle will become larger. When the user logs on to the site, the browser downloads the entire bundle and then displays everything. This can slow down the site a lot, so it is much better to split the code and thus break the bundle into pieces. As a result, the browser will download the necessary parts as needed, which will lead to an improvement in the loading time of the site.
To achieve our goal you can use React.lazy.
Note React.lazy and Suspensenot yet be used for display on the server side. To solve this problem, you can use React Loadable. In the documentation, you can find a good guide to the separation of bundles with server mapping.
Code sharing can be done in different ways, but a good starting point would be path-based separation.
As a rule, transitions to a new page take time to load. And if you re-display the entire page at a time, then users cannot interact with other elements on the page at the same time.
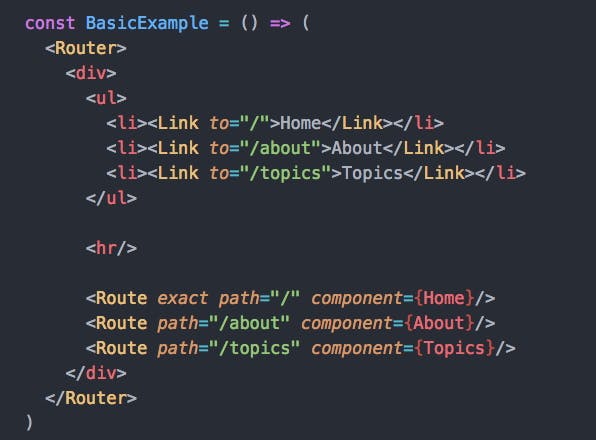
Here is an example of setting up path-based separation using libraries like React Router and React.lazy:
import { BrowserRouter as Router, Route, Switch } from 'react-router-dom'; import React, { Suspense, lazy } from 'react'; const Home = lazy(() => import('./routes/Home')); const About = lazy(() => import('./routes/About')); const App = () => ( Loading...}> );
SuspenseI need it here just in case: it will be shown if the necessary bundle has not loaded yet. Here you can use the download indicator to show users that the process is not in place. You can even use error bounds as a parent Suspenseto handle other errors like network errors.
React.lazy so far only supports default export. If you need to use named exports, check out the React documentation.
Use static type checking
JavaScript is a dynamically and weakly typed language, so many problems arise from the wrong types. You can use various type checking tools to solve this problem. Flow is a well-known and newbie-friendly option. It was developed on Facebook and is often used with React. It allows you to annotate variables, functions, and components of React using a special syntax and makes it possible to quickly catch errors. Here you can learn the basics of Flow, and in this official guide, you will find step-by-step instructions for use.
So, what do you need to do to become an advanced developer of React
- Use fragments instead of div.
- Use the context frequently.
- Use error boundaries.
- Use production assembly in a real environment.
- Use ref links to interact with the child.
- Use code sharing.
- Use static type checking.
The post React: practices that will help become an advanced developer appeared first on Creador.