


The most detailed instruction for those who need Xcode or just want to try Apple’s proprietary OS.
1. Check PC compatibility
To run macOS, you need a relatively modern computer. For more or less comfortable work, you need a quad-core processor, 8 GB of RAM and discrete graphics.
In addition, the processor must support virtualization technologies at the hardware level. For Intel chips, it is VT-x or VT-d, for AMD – AMD-V. Almost all modern processors have it, but it will not be superfluous to check.
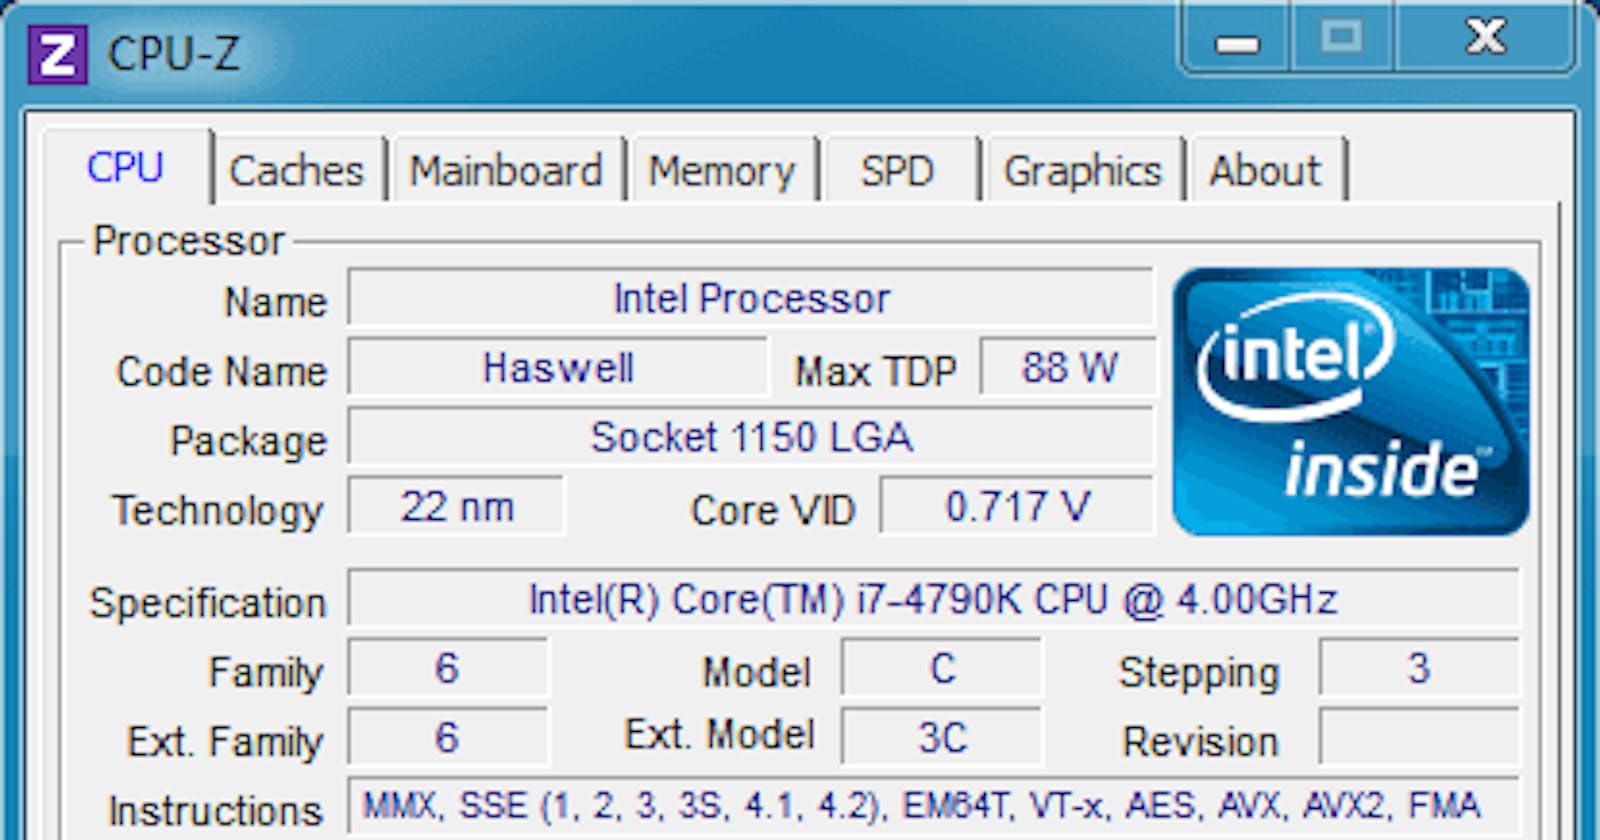
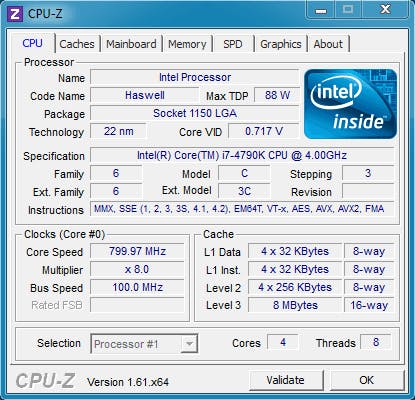
This can be clarified in the description of the specific chip model on the manufacturer’s website or using the free CPU-Z utility.
- Download the application from the official site and install.
- Launch CPU-Z and take a look at the Instructions line.
- If there are the above markings, then everything is in order.
- If not, you can use software virtualization, but in this case, the performance will be noticeably lower.
2. Prepare the macOS image
macOS installation images are not freely available, and Apple also prohibits the use of its OS on computers from other manufacturers. To get a boot disk image, you can try to find it on the Internet or borrow a Mac from a friend.
We will use the second option.
- On a Mac, follow the link and click “Open App Store App”.
- Click “Download”, wait for the installer to download, and close it.
- Open the folder “ Programs ” → “Utilities” and launch “Terminal”.
- Create a disk image container by copying the command
hdiutil convert ~/Desktop/InstallSystem.dmg -format UDTO -o ~/Desktop/HighSierra.iso - Mount it with a team
hdiutil attach /tmp/HighSierra.cdr.dmg -noverify -mountpoint /Volumes/install_build - Deploy the system installer to the created image using the command
sudo /Applications/Install\ macOS\ High\ Sierra.app/Contents/Resources/createinstallmedia --volume /Volumes/install_build - Enter the administrator password and confirm the action by pressing Y and Enter.
- Move the image to the desktop with the command
mv /tmp/HighSierra.cdr.dmg ~/Desktop/InstallSystem.dmg - Unmount the installer with the command
hdiutil detach /Volumes/Install\ macOS\ High\ Sierra - Convert the macOS image to ISO format with the command
hdiutil convert ~/Desktop/InstallSystem.dmg -format UDTO -o ~/Desktop/HighSierra.iso - Change the image file extension to ISO and transfer it using a USB flash drive to the PC where the virtual machine will be installed.
3. Select and install virtualization software
There are many paid and free virtual machines. For installing macOS, VMWare, Parallels, VirtualBox are suitable. For our example, take the latter: it is freely available and well known.
- Go to the official VirtualBox website and click on the Windows hosts link.
- Open the downloaded file and follow the prompts of the installation wizard.
- Confirm the installation of additional components in the process.
4. Create a virtual machine
Now in VirtualBox, you need to create our virtual computer, on which we will later install macOS.
- Run the utility, click the “Create” button and specify the name of the machine.
- Specify the type and version of the OS, in our case, Mac OS X and macOS 10.13 High Sierra.
- Specify the amount of RAM. The more, the better, but it’s better not to go beyond the green zone.
- Select Create New Virtual Disk and type VDI.
- Specify the format “Dynamic” and set the desired size. Recommended from 30 GB depending on the amount of software that you plan to use.
5. Configure the virtual machine
To start the guest OS correctly, you need to allocate the optimal amount of resources for the main computer, configure some settings and select the macOS image as the boot disk.
- Select a virtual machine and click “Configure” on the toolbar.
- Go to the “System” section and on the “Motherboard” tab, uncheck the “Floppy disk” option, and then move it down with the arrow. Leave the rest unchanged.
- On the “Processor” tab, specify the number of cores. It is better not to leave the green zone.
- In the “Display” section, set the maximum amount of video memory and make sure that both checkmarks are unchecked.
- In the “Media” section, click the line “Empty”, and then click on the disk icon and select the ISO image that we prepared in the second step.
- Click OK to save the settings and close VirtualBox.
6. Configure advanced settings
Due to the limitations mentioned above, macOS only runs on Apple-branded computers. In order for the system to be installed in VirtualBox, you will have to play a bit in the console and pretend to be iMac.
- Open a search, type cmd and run Command Prompt.
- Copy the following commands one by one, replacing the mac in them with the name of your virtual machine.
cd "C:\Program Files\Oracle\VirtualBox\"
VBoxManage.exe modifyvm "mac" --cpuidset 00000001 000106e5 00100800 0098e3fd bfebfbff
VBoxManage setextradata "Your Virtual Machine Name" "VBoxInternal/Devices/efi/0/Config/DmiSystemProduct" "iMac11,3"
VBoxManage setextradata "Your Virtual Machine Name" "VBoxInternal/Devices/efi/0/Config/DmiSystemVersion" "1.0"
VBoxManage setextradata "Your Virtual Machine Name" "VBoxInternal/Devices/efi/0/Config/DmiBoardProduct" "Iloveapple"
VBoxManage setextradata "Your Virtual Machine Name" "VBoxInternal/Devices/smc/0/Config/DeviceKey" "ourhardworkbythesewordsguardedpleasedontsteal(c)AppleComputerInc"
VBoxManage setextradata "Your Virtual Machine Name" "VBoxInternal/Devices/smc/0/Config/GetKeyFromRealSMC" 1
7. Install macOS in a virtual machine
Now you can proceed to the macOS installation itself. This procedure is divided into several stages and takes about an hour. In the process, you will have to tinker with the command line again, but for the last time.
youtube.com/watch?v=zY1tX1qghBY
First step
- Open VirtualBox and start the virtual machine.
- The system will preload. A lot of text will be displayed on the screen, among which there may be information about errors. Do not pay attention to it.
- After a few minutes, a logo with an apple will appear and the graphical interface will load.
- Select the system language and launch the “Disk Utility” from the menu.
- Specify the virtual disk that we created in the fourth step and click the “Erase” button.
- Set a name and leave the rest of the options as they are. Confirm erase.
- Select “Install macOS” in the utility window and click “Continue.”
- Accept the license agreement and click on the created disk.
- Wait until the installation files are copied to the disk and the system reboots.
- When the “macOS Utilities” window appears again on the screen, go to the Apple menu and click “Turn Off.”
Second phase
- Select a virtual machine in VirtualBox and open its settings.
- Go to the “Media” section and click on the line HighSierra.iso, and then on the disk icon and click “Remove disk from the drive.”
- Click OK and start the virtual machine again.
- After loading, a UEFI shell appears with a command line, into which you need to manually enter the following commands in turn:
Fs1:cd "macOS Install Data"cd "Locked Files"cd "Boot Files"boot.efi
Third stage
- After that, the graphical interface will start and installation will continue.
- After a few minutes, the virtual machine will reboot and the initial system configuration interface will open.
- Specify the country and keyboard layout.
- Select Don’t transfer any information now to configure the system as new.
- Skip logging into your Apple ID by clicking Setup later and Skip.
- Accept the terms of the license agreement, and then enter the username and password.
- Click Continue and customize your keyboard using the prompts.
8. Check the operation of the virtual machine
macOS installation is complete. The operating system operates in a separate window, which can be minimized or transferred to another monitor.
To turn on the virtual machine, open VirtualBox and click the “Run” button. Shutdown and reboot can be done both from the utility and through the macOS system menu.
The post How to install macOS through a virtual machine appeared first on Creador.